Intro
The aim of this doc is to guide over the process to set up Docker Containers as Build Agents for Jenkins.
It’s very common to consider Jenkins nodes and agents as synonyms, but strictly speaking are not the same.
A Jenkins node, also known as a Jenkins server, is any machine (physical or virtual) connected to the Jenkins network or the Jenkins environment. Nodes provide computational resources and environments to execute Jenkins build jobs. Both controllers and agents are considered to be nodes.
In summary, we can say that Jenkins Nodes are the machines on which Agents run.
By using docker containers as agents, you can reduce and simplify the process to create agents: every build spins up a new container, builds the project, and is destroyed.
A common practice is to create docker containers to execute the app build process. In this doc, we will see how to create those containers.
Configuring Docker REST API
First, you need a Docker host. The Jenkins server (master) will connect to this Docker host to spin up container agents.
This connection happens through Docker’s REST API, so we need to enable the remote API on the Docker host. I’ll use an Ubuntu server as my Docker host, but feel free to use any OS that supports Docker.
We can enable remote access to the docker daemon configuring docker.service systemd unit file for Linux distributions:
-
Use the command
sudo systemctl edit docker.serviceto open and override file for docker.service in a text editor, or directly open with your preferred editor the docker service file/lib/systemd/system/docker.service -
In our case, we will define 4243 as the port to expose the docker REST API. This will be the port where the Jenkins master will connect to make docker run the container agents. So, in any of above cases, search for **ExecStart **and replace that line with the following:
[Service]
ExecStart=/usr/bin/dockerd -H tcp://0.0.0.0:4243 -H unix:///var/run/docker.sock
- After saving the file, reload the system configuration and restart docker by issuing the following commands
$ sudo systemctl daemon-reload
$ sudo systemctl restart docker.service
- Validate REST API by executing the following curl commands. Replace localhost with your host IP.
$ curl http://localhost:4243/version
{"Platform":{"Name":"Docker Engine - Community"},"Components":[{"Name":"Engine","Version":"24.0.2","Details":{"ApiVersion":"1.43","Arch":"amd64","BuildTime":"2023-05-25T21:51:00.000000000+00:00","Experimental":"false","GitCommit":"659604f","GoVersion":"go1.20.4","KernelVersion":"6.5.0-17-generic","MinAPIVersion":"1.12","Os":"linux"}},{"Name":"containerd","Version":"1.6.21","Details":{"GitCommit":"3dce8eb055cbb6872793272b4f20ed16117344f8"}},{"Name":"runc","Version":"1.1.7","Details":{"GitCommit":"v1.1.7-0-g860f061"}},{"Name":"docker-init","Version":"0.19.0","Details":{"GitCommit":"de40ad0"}}],"Version":"24.0.2","ApiVersion":"1.43","MinAPIVersion":"1.12","GitCommit":"659604f","GoVersion":"go1.20.4","Os":"linux","Arch":"amd64","KernelVersion":"6.5.0-17-generic","BuildTime":"2023-05-25T21:51:00.000000000+00:00"}

$ sudo netstat -lntp | grep dockerd
tcp6 0 0 :::4243 :::* LISTEN 3551202/dockerd
Make sure the following ports are enabled in your server firewall to accept connections from Jenkins master:
• Docker Remote API port 4243
• Docker Hostport Range 32768 to 60999
32768 to 60999 is used by Docker to assign a host port for Jenkins to connect to the container. Without this connection, the build node will go in a pending state.
Once you enabled and tested the API, you can now start building the Jenkins agent docker image.
Docker Plugin for Jenkins
Before starting to create the docker image, some words on the Docker plugin for Jenkins (https://plugins.jenkins.io/docker-plugin/)
According to the official Docker plugin documentation:
This plugin allows containers to be dynamically provisioned as Jenkins nodes using Docker. It is a Jenkins Cloud plugin for Docker.
Also, the documentation states:
The aim of this docker plugin is to be able to use a Docker host to dynamically provision a docker container as a Jenkins agent node, let that run a single build, then tear-down that node, without the build process (or Jenkins job definition) requiring any awareness of docker.
Notes:
• This plugin does not use the OS’s native docker client; it uses docker-java. You do not need to install a docker client on Jenkins or on your agents to use this plugin.
• This plugin does not provide a Docker daemon; it allows Jenkins to use a docker daemon. Once you’ve installed docker somewhere, this plugin will allow Jenkins to make use of it.
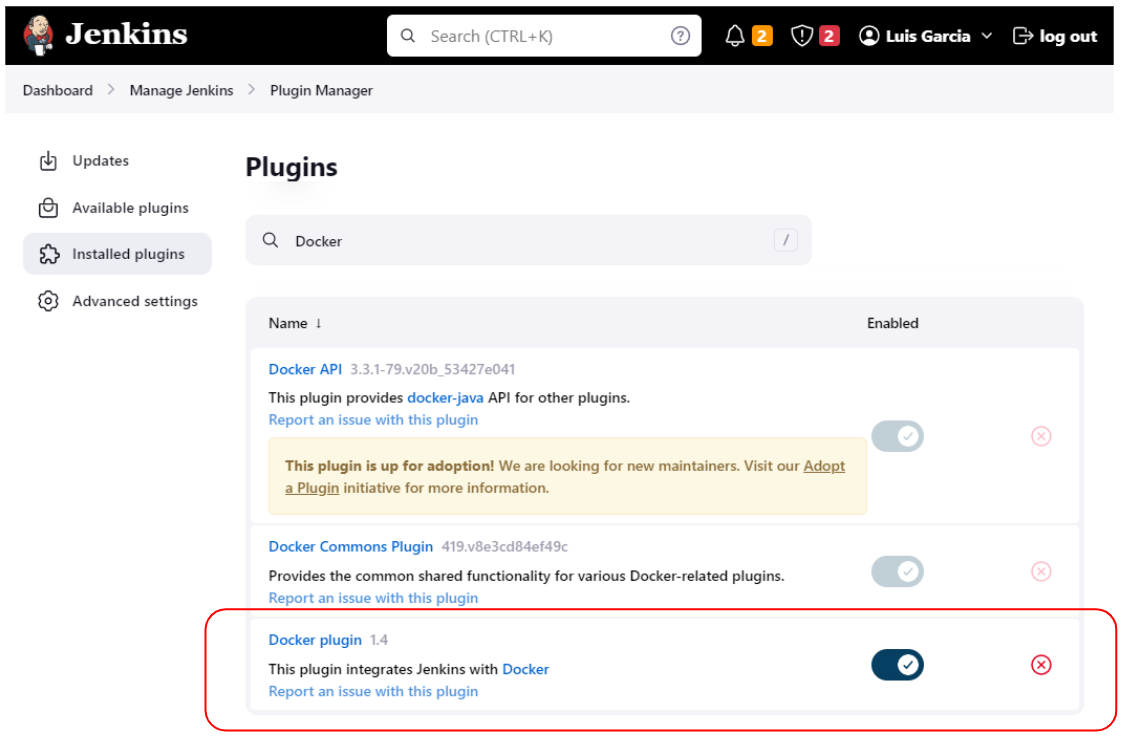
Installing Docker plugin for Jenkins
-
Go to Plugin Manager (Jenkins Dashboard –> Manage Jenkins –> Manage Plugins)
-
Select the Available tab, search for “Docker”, install the Docker plugin (https://plugins.jenkins.io/docker-plugin/) and restart Jenkins.
Configuring Docker plugin for Jenkins and creating container agents
Once installed, go to Jenkins Dashboard » Manage Jenkins » Manage Nodes and Clouds.
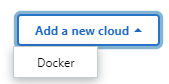
Docker plugin is a “Cloud” implementation, so we need to select Configure Clouds

and Add a new Cloud of type “Docker”
Under docker, we need to fill out the details as shown in the image below:
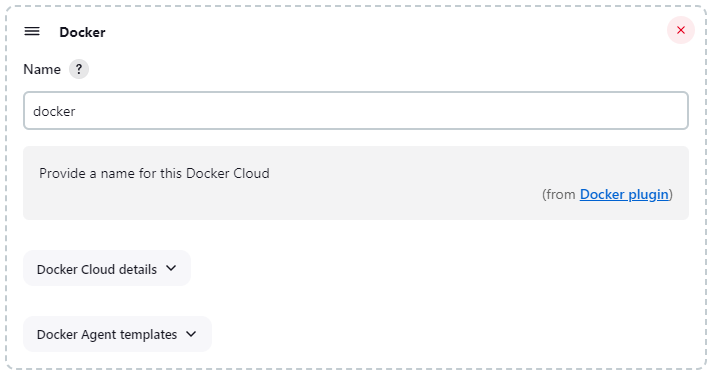
First of all, we need to name our cloud (“docker” in this example, but you can choose any other descriptive name). We can also see a couple of configuration panels: Docker Cloud Details and Docker Agent templates.
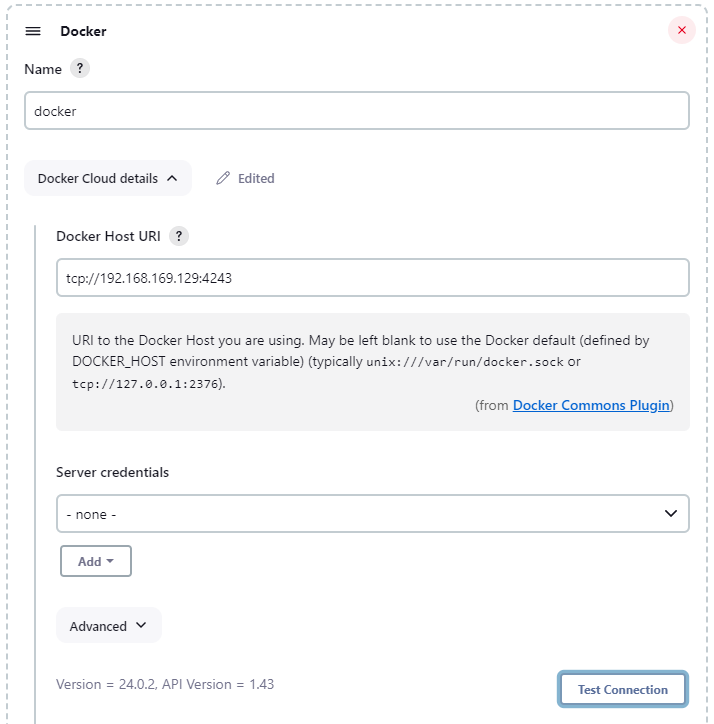
Docker Cloud details
By opening Docker Cloud details, the most important field is Docker Host URI. After filling in, we can click on Test Connection to see if it is working. In case of error please review your docker remote REST API configuration.
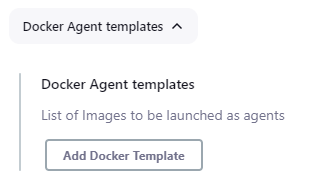
Docker Agent templates
Under the Docker Agent templates section, we can define as many container agents as we need. It’s important to note that all the container agents we can define here will be executed under the docker host above defined. In this way, we can define different containers that will act as Jenkins agents.
As you can see in the image below, by clicking on Add Docker template you can create a specific container agent.
By clicking on Add Docker Template, you will see a form like this:
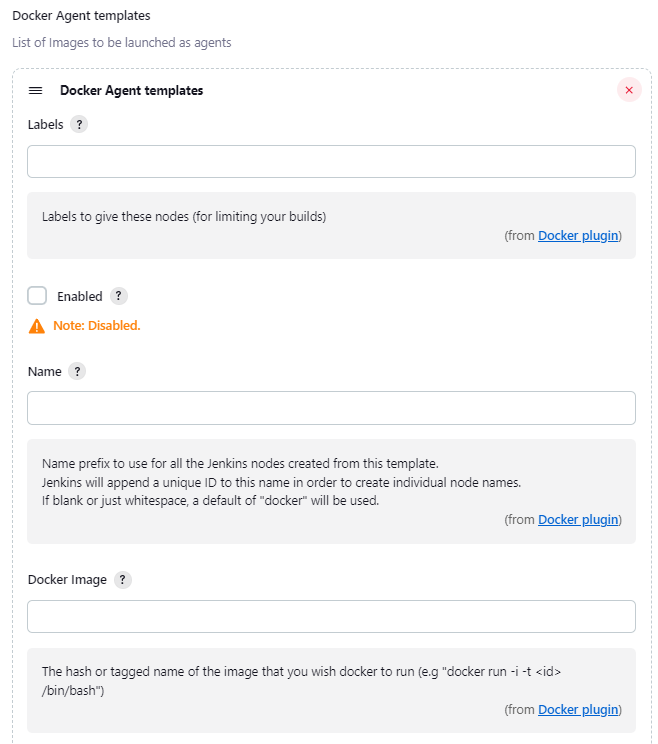
Fields:
• Labels: Identification label(s) for the agent. Within a pipeline, agents are identified not by name but by their label(s). Therefore, within a pipeline, the agent section specifies the label where the entire pipeline (or a specific stage) will be executed in the Jenkins environment
• Name: Just a prefix to identify the nodes created from this template (optional)
• Docker Image: This is the most important field because here we will indicate the docker image to be executed.
Before specifying our image, we should be aware that the Docker plugin allows us to create container agents in three different ways depending on the agent launch method. These are three different ways the Jenkins master and the container agents can communicate. And, depending on the chosen method, the image will have different requirements.
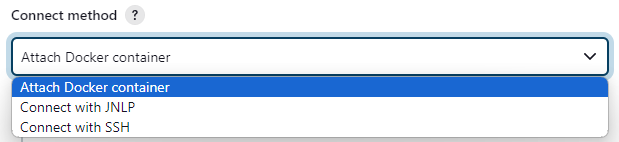
Let’s skip less relevant fields and concentrate on a high important one: the Connect method.
According to Docker plugin documentation:
For all connection methods, Jenkins will start by triggering a docker run. Then, after this step, there will optionally be more steps to establish the connection. There are currently three alternative ways to connect your Jenkins master to the dynamically provisioned Docker agents.
And the three connection methods are:
There are different pros and cons for each connection method. Depending on your environment, choose the one matching your needs. More detailed prerequisites are provided once you select a given method.
-
Attach Docker container: This method runs a container, then connects to it using docker exec, all by using the Docker API. The agent does not need to be able to reach the master through the network layers to communicate ; all will go through Docker API.
-
Connect with JNLP: The container will only be passed an initial docker run command with the right secret. And the remoting agent will establish the connection with the master through the network. Hence, the agent must be able to access the master through its address and port.
-
**Connect with SSH:** The specified image is expected to run an SSH server. Then, it will treat that computer like it usually does for any SSH connected agent: the master will log into it, copy the remoting agent, then start it.
Pros and cons of every Connect method
• Method #1 (Attach Docker container) is the easiest to implement. As you will read further in this doc, all needed within the agent image is a JDK and the Jenkins agent.jar. Also, the connection is unidirectional (master -> agent). The only drawback is that you need to manually update the agent.jar if the master version changes. But, there is an out-of-the-box agent image that contains both the JDK and the agent.jar, so you can use it.
• Method #2 (Connect with JNLP) is based on JNLP, a technology that allows to download the agent code from the master. It’s based on TCP or WebSockets to establish inbound connection to the Jenkins controller, so the agent must be able to access the master through its address and port, a requirement hard to accomplish depending on the network segmentation. Finally, JNLP technology is “quite” old, with deprecation and removal considerations. All this makes this option the least advisable.
• Method #3 (Connect with SSH) is slightly more difficult to implement but the most secure and maintainable option. With this connection method, the agent.jar is copied securely to the container (so it’s always upgraded) and the connection is unidirectional (master -> agent) so there is no need to open connectivity from the docker host back to the master.
In summary, we could say that Option #3 (Connect with SSH) is the preferred one, followed by #1 (Attach Docker container) and we would discourage option #2 (Connect with JNLP) for the above reasons (although might be valid in some specific scenarios).
The image-building process depends on the chosen connect method. We will discuss the three available options in detail.
Connect method #1 : Attach Docker container
This is the simplest connection method. As said above, with this connection method, the agent does not need to be able to reach the master through the network layers to communicate; all will go through Docker API. This reduces our network configuration requirements.
If you select this connection method, the docker image to be used is quite simple. Just needs to have a JDK installed and the Jenkins agent executable (agent.jar). You can create your image from scratch of you can use the ready-to-use image: jenkins/agent
Just in case you want to build your own image, you can use jenkins/agent as a basis for a custom image.
FROM jenkins/agent
RUN apt-get update && apt-get install XXX
... your dockerfile instructions here …
Connect method #2 : Connect with JNLP
As said above, this connection method is also very simple. But Jenkins controller URL has to be reachable from the container, so please consider this requirement before selecting this method.
The image needs a JDK installed. You can use jenkins/inbound-agent as a basis for a custom image.
FROM jenkins/inbound-agent
RUN apt-get update && apt-get install XXX
... your dockerfile instructions here …
Connect method #3 : Connect with SSH
This connection method is the most secure, reliable and maintainable option. It’s not as simple as the previous ones to implement, but nothing really hard ;)
In the following examples we will use a key pair to authenticate. So, it’s worth making a quick summary on how to create a key pair.
The SSH key generation process creates two keys: a private and a public key.
• Public key: This key must be installed on the server we want to login. This way, the server will be able to recognize and authenticate the client.
• Private key: This is the most important key because it uniquely identifies a client. Due to this, it must be kept secure. If it is compromised (and it’s not been further secure by a passphrase) anyone could use it and authenticate as being you.
You can generate a ssh key pair by entering the following command:
$ ssh-keygen -t rsa -b 4096
Basically, -t specifies the type of key to create (possible values are “dsa”, “ecdsa”, “ecdsa-sk”, “ed25519”, “ed25519-sk”, or “rsa”) and -b specifies the number of bits in the key to create (for RSA keys, the minimum size is 1024 bits and the default is 3072 bits)
IMPORTANT note:
We will include the public key in our container. And we will use the private key to authenticate from Jenkins.
As far as we have tested:
if you use RSA keys, the Docker plugin only works with keys that are 4096 size !! At the moment of writing this doc, I am not sure if this a bug or any known limitation of the plugin, but it’s worth mentioning because if you use the default size (3072) the authentication will not work.
Once you generate the key pair, we need to do the following:
-
Save that private key into Jenkins Credential Manager, so it can be used by the pipelines
-
Install the public key into the container (so the container can recognize the client)
To save the private key into into Jenkins Credential Manager, create a new credential (kind: SSH Username with private key)
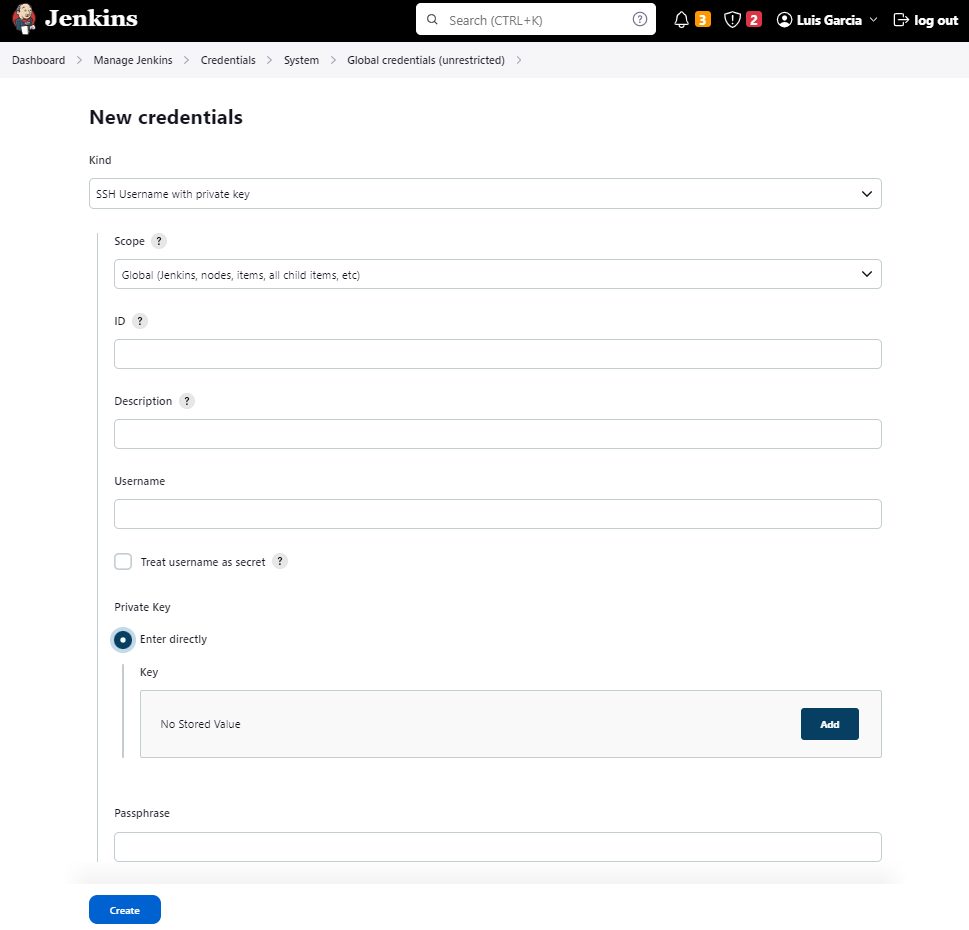
To make the public key available to our container, we will save the public key into the file $HOME/.ssh/authorized_keys of the image (being $HOME the home dir of the user we will use to connect to the container).
$ cat my_public_key >> authorized_keys
Our purpose is to run a docker container that serves as a Jenkins agent. For this purpose, we must first build a docker image that will accept ssh connections from Jenkins and work as an agent.
In the former methods, the images somehow included some jar code from Jenkins. This case is not different but with one difference: it’s completely transparent to us, the jenkins agent code is copied behind the scenes and we don’t need to take care about it.
So, basically, we only have to include the proper software in our images to make it a SSH server.
The basic structure of the Dockerfile is:
- Install a SSH Server
- Install JDK
- Add a user (jenkins in our case)
- Add the public key to the home directory of the jenkins user
- Expose the SSH port and start the SSH server
This Dockerfile depends on the base image we use, so we will see some examples below.
Ubuntu
You can use the Dockerfile below as a template for your needs.
FROM ubuntu:18.04

# Update the repository
RUN apt-get update && \
    apt-get -qy full-upgrade && \
# Install git
    apt-get install -qy git && \
# Install a basic SSH server
    apt-get install -qy openssh-server && \
    mkdir -p /var/run/sshd && \
# Install JDK 11
    apt-get install -qy openjdk-11-jdk && \
# Cleanup old packages
    apt-get -qy autoremove && \
# Add user jenkins to the image
    adduser --quiet jenkins && \
# Set password for the jenkins user
    echo "jenkins:jenkins" | chpasswd

# Copy authorized keys
COPY --chown=jenkins ./authorized_keys /home/jenkins/.ssh/authorized_keys
RUN chown -R jenkins:jenkins /home/jenkins/.ssh/
RUN chmod 700 /home/jenkins/.ssh/
RUN chmod 600 /home/jenkins/.ssh/authorized_keys

# Standard SSH port
EXPOSE 22
CMD ["/usr/sbin/sshd", "-D"]
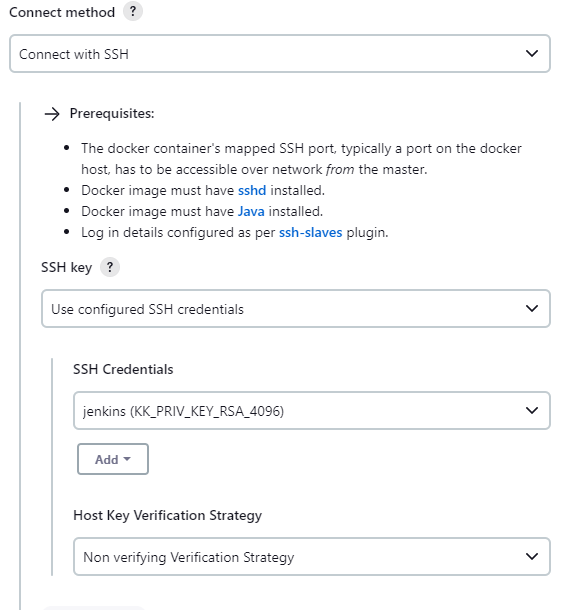
When configuring the Docker Agent template, be sure that you use “Connect with SSH” method and “Use configured SSH credentials” as SSH Key. Under SSH Credentials choose the credential already created with the private key.
Alpine
In the case of Alpine, the Dockerfile is somewhat different due to the differences on the underlying OS.
FROM alpine:latest
RUN apk add --no-cache openssh openssh-server openssh-keygen
RUN addgroup -S jenkins
RUN adduser -D -G jenkins jenkins
RUN echo "jenkins:jenkins" | chpasswd

# Copy authorized keys
COPY --chown=jenkins ./authorized_keys /home/jenkins/.ssh/authorized_keys
RUN chown -R jenkins:jenkins /home/jenkins/.ssh/
RUN chmod 700 /home/jenkins/.ssh/
RUN chmod 600 /home/jenkins/.ssh/authorized_keys

EXPOSE 22
RUN ssh-keygen -A
CMD ["/usr/sbin/sshd", "-D"]
From jenkins/ssh-agent
Jenkins also provides a base image to build your container. So it’s somehow easier to use it than building from scratch.
FROM jenkins/ssh-agent:latest
RUN apt-get update
RUN apt-get install -qy zip && \
apt-get install -qy curl
COPY --chown=jenkins ./authorized_keys "${JENKINS_AGENT_HOME}"/.ssh/authorized_keys
Recap and conclusions
In this doc, we have seen how to configure Jenkins to use Docker containers as agents. We have seen the three different connection methods and the requirements for each one.
We have also seen how to build a Docker image that will work as a Jenkins agent, and how to configure Jenkins to use it.
The most secure and maintainable option is to use the SSH connection method. This method requires a bit more work to set up, but it’s worth it.
The Docker plugin for Jenkins is a powerful tool that allows you to dynamically provision Docker containers as Jenkins agents. It’s a great way to scale your Jenkins infrastructure and make your builds more efficient.